The following guidelines are for the installation of basic retaining walls (and free-standing landscape walls) where no special circumstances are present. If your wall design exceeds 36” in height; is retaining a sloped hill; is being constructed on a slope; or requires a tiered wall design or similar, please contact RCP for additional information and construction guidelines for your specific project. Shop our selection of Retaining Wall Blocks.
Retaining Walls are designed to hold up a surcharge of soil such as a sloping hill or raised planter box. All retaining walls share some common building components in their construction. Below is an overview of the different types of walls and these common components. Free-standing landscape walls will share some, but not all, of the listed components.
* This step applies to both Retaining and Free-standing Landscape Walls
The leveling pad is the first piece in constructing a stable wall that will last for years. This is the foundation on which the weight of the wall will rest, and therefore one of the most important pieces to consider when installing any landscape wall.
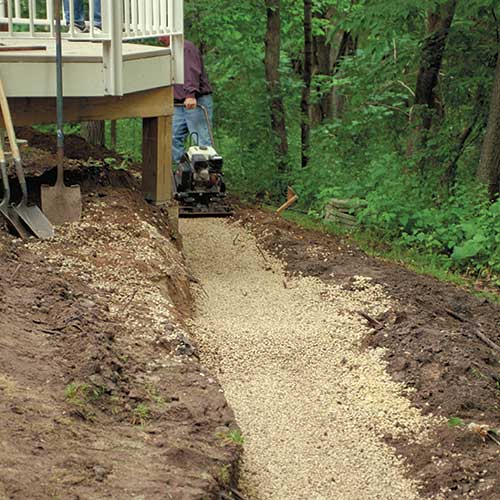
Remove all surface vegetation and debris. Do not use this material as backfill. After selecting the location and length of the wall, excavate a base trench to the designed width and depth. These measurements will vary depending on block style and wall design (Contact RCP Block & Brick for project specific measurements); but expect the depth to be approximately as deep as the height of one block unit plus 6 inches; and as wide as the width of one block unit plus 12 inches.
Fill the prepared trench with a 6” deep base of clean 3/4" Crushed Gravel. DO NOT USE PEA GRAVEL. Thoroughly compact and level the 3/4" crushed gravel to create your leveling pad.
NOTE: If grade changes along base of the wall, create a stepped leveling pad as required. Always start wall at lowest elevation, working to highest.
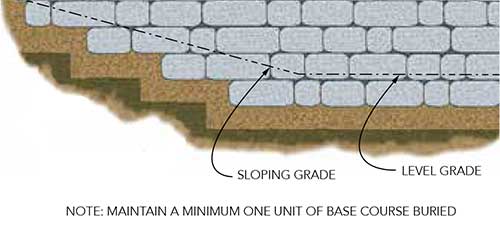
Leveling Pad for Sloped and Level Grade
Leveling Pad for Sloped and Level Grade
The first course of block that you lay is known as the base course. It is paramount that this course is absolutely level both front-to-back and side-to-side. If your base course is just a fraction out of level, it will be quite noticeable once you get to your final course.
* This step applies to both Retaining and Free-standing Landscape Walls
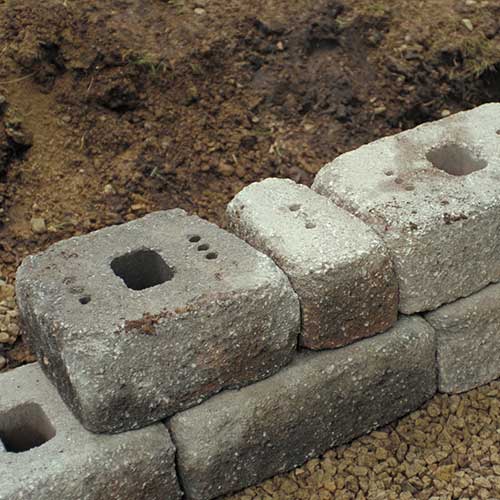
The first course of block will be placed below final grade, meaning you will be burying all or part of the first course. Place the first course of block units end to end on the prepared leveling pad. Measure each block front- to-back and side-to-side. It is important to make sure each unit is absolutely level. Complete this first course before adding additional courses.
NOTE: On units that use a pin connection, the long groove (receiving channel) on the unit should be placed down and the pin holes should face up. On units that use a lip connection system, remove the lips from the first course of block units to help in leveling by holding unit firmly on ground and striking lip with hammer.
PRO TIP: For alignment of straight walls, use a string line aligned on the pin holes of applicable units or back of the block of lipped units.
* Only required for Retaining Walls
After the base course of block is installed, you will need to install perforated drainage pipe behind this first course of block. Water will flow down through the backfill material to the base of the retaining wall. The drainage pipe will be located here to move the water away from behind the wall. Water (hydrostatic pressure) is the leading cause of retaining wall failures.
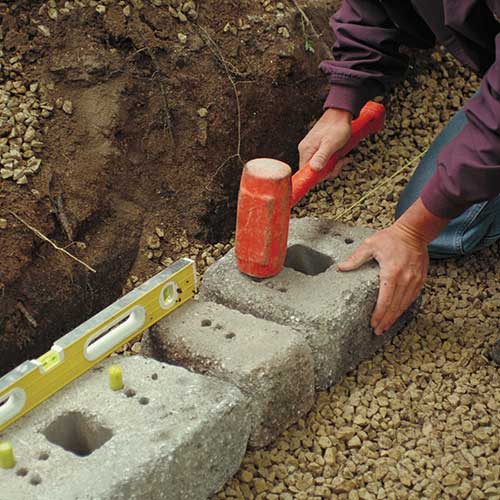
Installing Base Course of Wall Block
*Only required for Retaining Walls
Adding proper backfill to your retaining wall is extremely important as this is a key element in helping divert water away from the back of the wall, eliminating hydrostatic pressure, the leading cause of retaining wall failure. RCP recommends using clean 3/4" Crushed Gravel as backfill.
NOTE: If using block that requires pin connection, insert pins prior to backfilling to prevent gravel from plugging pin holes (Description in Step 4).
The width of backfill area will vary depending on your specific project, but expect to fill 12 inches behind the back of installed block units. Using 3/4” Crushed Gravel, begin to backfill after each course or two, filling open spaces between units, and filling open cavities/cores with gravel. As you backfill each course, do so in 6” increments (lifts) and compact each lift before adding the next. Backfill and compact behind each course before installing additional courses.
NOTE: For compaction, a vibrating plate compactor or hand tamper is suggested. Do not use heavy ride-on compaction equipment within 3’ (1m) from back of wall. Do not use jumping or ramming type compaction.
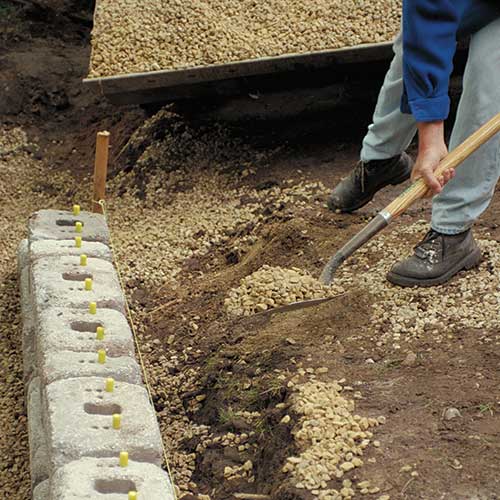
Backfilling the Retaining Wall
* This step applies to both Retaining and Free-standing Landscape Walls
The next step will be to start adding additional courses. This is where your landscape wall will really begin to take shape. Continue alternating between steps 3 and 4 until your retaining wall has reached the desired height.
Each retaining wall block style will require a specific method of connecting each unit to the course below. As you add additional courses, you will utilize the connection method specific to the style of block you are using.
Adding Additional Courses
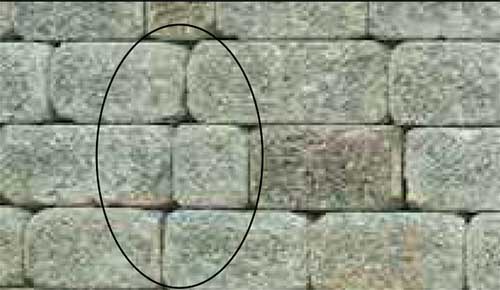
Avoid "Stack Bond" Where Joints Line Up
* This step applies to both Retaining and Free-standing Landscape Walls
The final step to finishing your retaining wall or landscape wall project is the addition of a wall cap. There are a variety of caps to choose from that compliment each individual wall style. The addition of a cap adds a finished look to the final product. See all available wall caps.
Once the wall has reached the desired height, clean off the last course of block in preparation for the cap or coping to finalize the wall. This can be accomplished by brushing with broom or hosing off. Once units are dry and clean, use construction adhesive for a mechanical bond. Cap may be flush or overhanging as required by aesthetics and design.
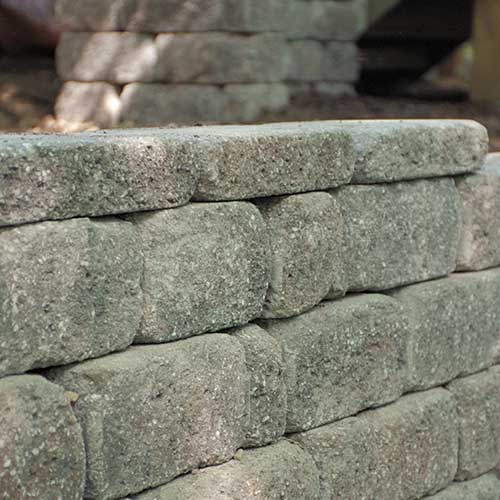
Adding Wall Cap to Retaining Wall